Step 1: Set up your project folder
- Open your IDE. Google Antigravity is a good free option if you don’t have one
- Create a new project folder and name it after your app
- Drag your PRD markdown file directly into that folder
Step 2: Give Claude Code its instructions
Open the Claude Code terminal chat inside your project and send this prompt:
“Here is the PRD for the app I want to build. Read it to understand the context, then create a to-do.md to plan out the initial version.”
Go through a few confirmations with Claude until it has everything it needs, then let it build.
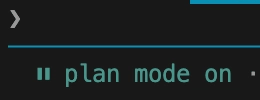
Make sure your Claude Code agent is set to Plan mode as well. You can do this with Shift+Tab to cycle through the modes.
Step 3: View your prototype
Once Claude finishes, type this into the terminal to launch your app:
npm run devOr tell Claude: “Spin up a development server on port 3000.”
Click the link it gives you. You’ll see your first working prototype. It will probably look rough. That’s completely normal. You’ll iterate as you keep developing.
Step 4: Create your CLAUDE.md
This is the most important step most people skip. Tell Claude:
“Write a CLAUDE.md file for this project.”
This file becomes Claude’s memory for your app. It stores your design rules, app logic, and project context so Claude stays consistent every time you open a new session. Without it, Claude starts from scratch every single time.
What comes next
This guide is just to help you get started with version one of your app. It is by no means a playbook for full development.
From here, building is just iteration. Attach screenshots of what looks off and tell Claude what to fix in plain language, no technical knowledge required.